

You ran twelve customer interviews. You watched people get stuck, wrote down what they said, and found a few patterns that matter. Then you built the readout, and it looks like this: a slide on how you ran the study, a slide on who you spoke to, six slides of quotes grouped under headings like “Onboarding” and “Feature requests”, and a final slide called “Next steps” that you reach with four minutes left.
The research was good. The readout hides it. This guide is for product managers, researchers, founders and anyone who presents customer research to people who have to decide something. It shows how to restructure a research readout so that the finding comes first, the evidence backs it up, and every finding ends with something the room can act on.
Why most research readouts bury the finding
Most readouts follow the order in which the work happened. You planned the study, recruited people, ran the sessions, grouped what you heard, and only then worked out what it meant. It feels natural to present it the same way, because that is how you lived it.
Your audience lives it differently. A product lead, a founder or an executive comes to a readout with one question: what should we do differently because of this? Everything before the answer is waiting time. If the meeting runs late or someone leaves early, they leave with the method and the quotes, but not the conclusion.
There is a second problem. Quote walls feel like evidence, but they push the analysis back onto the audience. When a slide shows four quotes under the heading “Payments”, each person in the room draws their own conclusion. The loudest person’s reading usually wins, and it may not be yours.
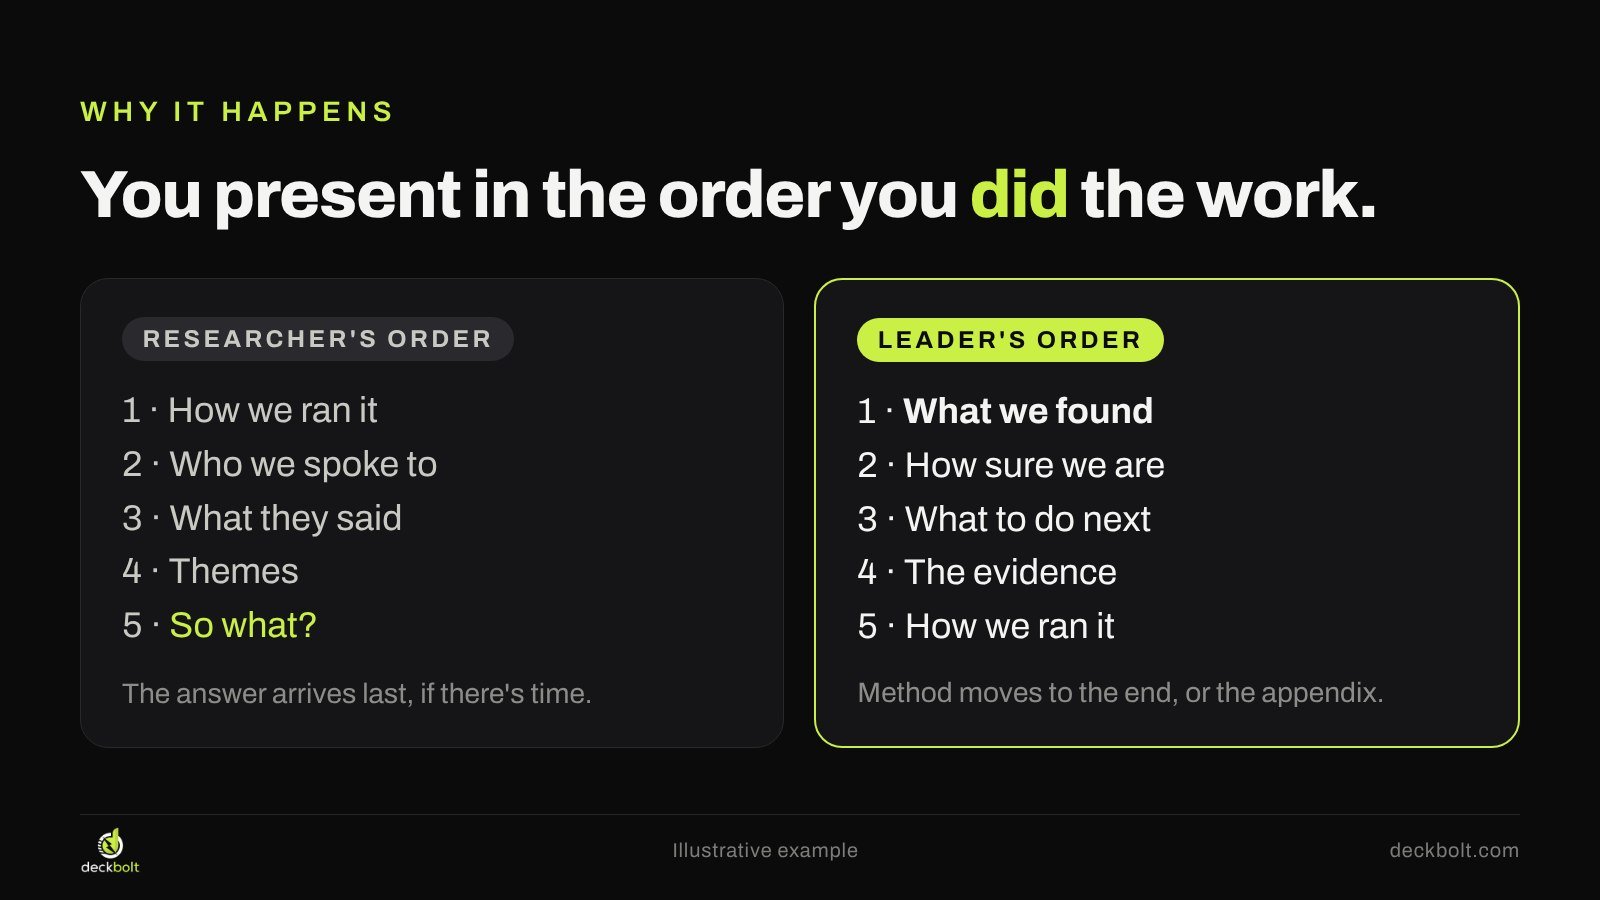
The fix is not more slides or better quotes. It is a different order: what we found, how sure we are, what we should do, and then the evidence and the method for anyone who wants them.
Turn every theme into a finding sentence
The core move is small but it changes everything. A theme is a topic: “Payments pain points”, “Onboarding feedback”, “Mobile”. A finding is a sentence that says what happens, to whom, and why. A simple pattern helps:
[Who] [does what] [when or where], because [why].
Here is an illustrative example from a study of scheduling software for small clinics:
- Theme: Payments pain points
- Finding: Clinic managers stop setup at the payments step, because they need a bank letter they don’t have to hand.
The finding is longer, and that is the point. It names the people, the moment and the cause. A leader can now agree or disagree with something specific. You can test it. You can design a fix for it.
Writing finding sentences also exposes weak themes. If you cannot fill in the “because”, you may have an observation rather than a finding. That is fine, but label it honestly, and don’t give it the same weight as the patterns you understand.
Step 1: make the finding the slide title
Once you have finding sentences, put them where people look first: the slide titles. Many leaders skim a deck by its titles, especially if it is sent ahead or forwarded after the meeting. If your titles are topics, the skim tells them nothing. If your titles are findings, the skim is the readout.
Compare these pairs:
- “Onboarding feedback” becomes “Setup takes two sittings, so most managers finish it at home.”
- “Feature requests” becomes “‘Mobile app’ requests are really about checking today’s schedule away from the desk.”
- “Support” becomes “Support isn’t the problem: every manager we asked rated it well.”
The last example matters. Findings don’t have to be problems. Telling a team what is working, and what not to spend time on, is often as useful as pointing out what is broken.
A quick test for each title: could someone repeat it to a colleague without the slide in front of them? If the answer is no, the title is still a label.
In PowerPoint, put each finding into the slide’s real title placeholder rather than a separate text box. Then View → Outline shows all your titles in one list, which is a fast way to read the readout the way a busy leader will. Google Slides doesn’t have the same outline view, but the slide thumbnails and the title placeholders still make the titles easy to scan.
Step 2: show evidence that counts
Under each finding, the evidence has three jobs: show how many people it applies to, show what they actually did, and let one person say it in their own words.
How many. Counts settle arguments that adjectives start. “Many users struggled with payments” invites a debate about what “many” means. “9 of 12 managers stopped at the payments step” does not. With small qualitative studies, give the count and the total, not a percentage. “75%” of twelve people sounds like a survey; “9 of 12” sounds like what it is.
What they did. Behavior is stronger than opinion. If you watched people during the sessions, say what happened: “7 left the page to look for a document. 4 didn’t come back that day.” That is harder to dismiss than “people found it confusing”.

One voice. A single quote that sounds like a real person makes the finding stick: “I had to wait until Monday to get the bank letter.” Choose the quote that explains the finding best, not the most dramatic one, and cut the rest. The others can live in the appendix or the research repository.
Keep the evidence visually quiet. A row of twelve dots with nine highlighted, a short line about behavior, and one quote fit comfortably on a slide. A wall of eight quote cards doesn’t.
Step 3: say how sure you are
Not every finding is equally solid, and the room knows it. If you present every pattern with the same confidence, people start doubting all of them. If you say how sure you are, finding by finding, the strong ones become more convincing.
A simple three-level scale works well:
- Strong: most people showed it, and you saw it happen, not just heard about it.
- Medium: several people said it, but you didn’t observe it directly.
- Lead: a few people mentioned it. Worth checking before anyone acts on it.

Put the level on the slide, next to the title or in a small tag. It costs almost no space and it answers the question someone was going to ask anyway.
Be clear about what qualitative research can and can’t do. Twelve interviews can show that a problem exists and explain why it happens. They can’t tell you how common it is across all your customers. If the decision depends on size, say so, and suggest how to measure it, for example with product analytics or a short survey.
Step 4: end every finding with fix, test or watch
A finding without a next step is an interesting fact. To turn your readout into decisions, end each finding with one of three verbs:
- Fix: you understand the problem well enough to act. “Let managers skip payments and finish it later.”
- Test: you have a promising idea but need evidence. “Show today’s schedule on the phone login page to three clinics for four weeks.”
- Watch: it’s a lead, not a pattern. “Ask about separate admin logins in the next round of calls.”
Add an owner and a rough timeframe to each. You are not assigning work in someone else’s team; you are proposing a next step so the discussion starts from something concrete. If a leader disagrees with your proposal, that is a useful conversation, and far better than nodding through a quote wall.
Then close the readout with one clear ask: the decision you need from this room, today. “Approve the payments change for the next sprint” is an ask. “Thoughts?” is not.
A before and after walkthrough
Here is how one slide changes when you apply all four steps. The example is illustrative.
Before: a slide titled “Interview themes” with three quote cards: “I do setup on Sunday nights”, “The payments page lost me” and “We’d love a mobile app”. Three different topics, no count, no conclusion. Each person reads it differently.
After: a slide titled “Setup stalls at payments: 9 of 12 managers stopped there.” A small tag says “Finding 1 of 3 · Strong”. Under the title, two short blocks: Why (“They need a bank letter they rarely have to hand”) and In their words (“I had to wait until Monday”). At the bottom, a dark bar: “Fix: let managers skip payments and add it later. Decision needed today.”
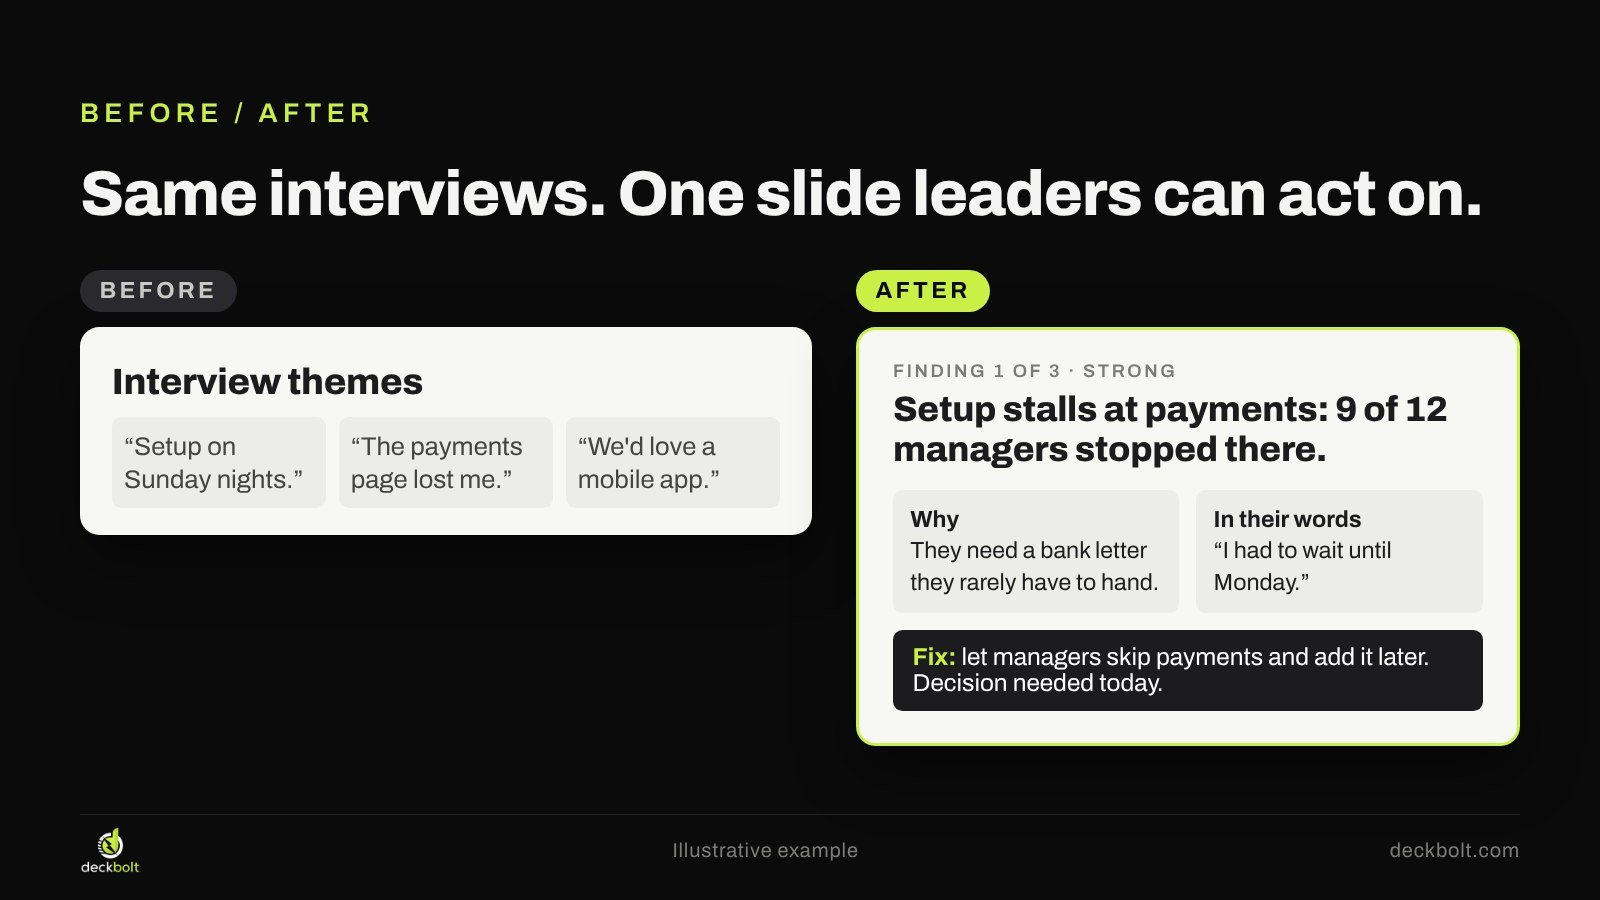
The after slide uses fewer words than the before slide, but it carries more: the finding, the strength of evidence, the cause, a human voice, a proposal and an ask. The other two quotes didn’t disappear. They became their own findings, or moved to the appendix.
Common mistakes to avoid
- Opening with the method. One line on who you spoke to and how is enough up front. The full method belongs at the end or in the appendix.
- Too many findings. Three to five findings is a readout. Twelve is a report. If everything is a finding, nothing is a priority. Rank them and lead with the one that matters most.
- Percentages from tiny samples. Say “9 of 12”, not “75%”.
- Quotes chosen for drama. The funniest or angriest quote is rarely the one that explains the finding best.
- Personas instead of findings. A persona slide describes people. It doesn’t say what to change. If you use personas, connect each one to the findings and decisions that affect it.
- No ask. If you don’t say what decision you need, the meeting ends with “great work, let’s discuss next week”.
A quick checklist before you present
- Is every slide title a finding, not a topic?
- Does each finding say how many people, and what they did?
- Have you said how sure you are, finding by finding?
- Does each finding end with fix, test or watch, with an owner?
- Is the method in the appendix, not up front?
- Is there one clear ask at the end?
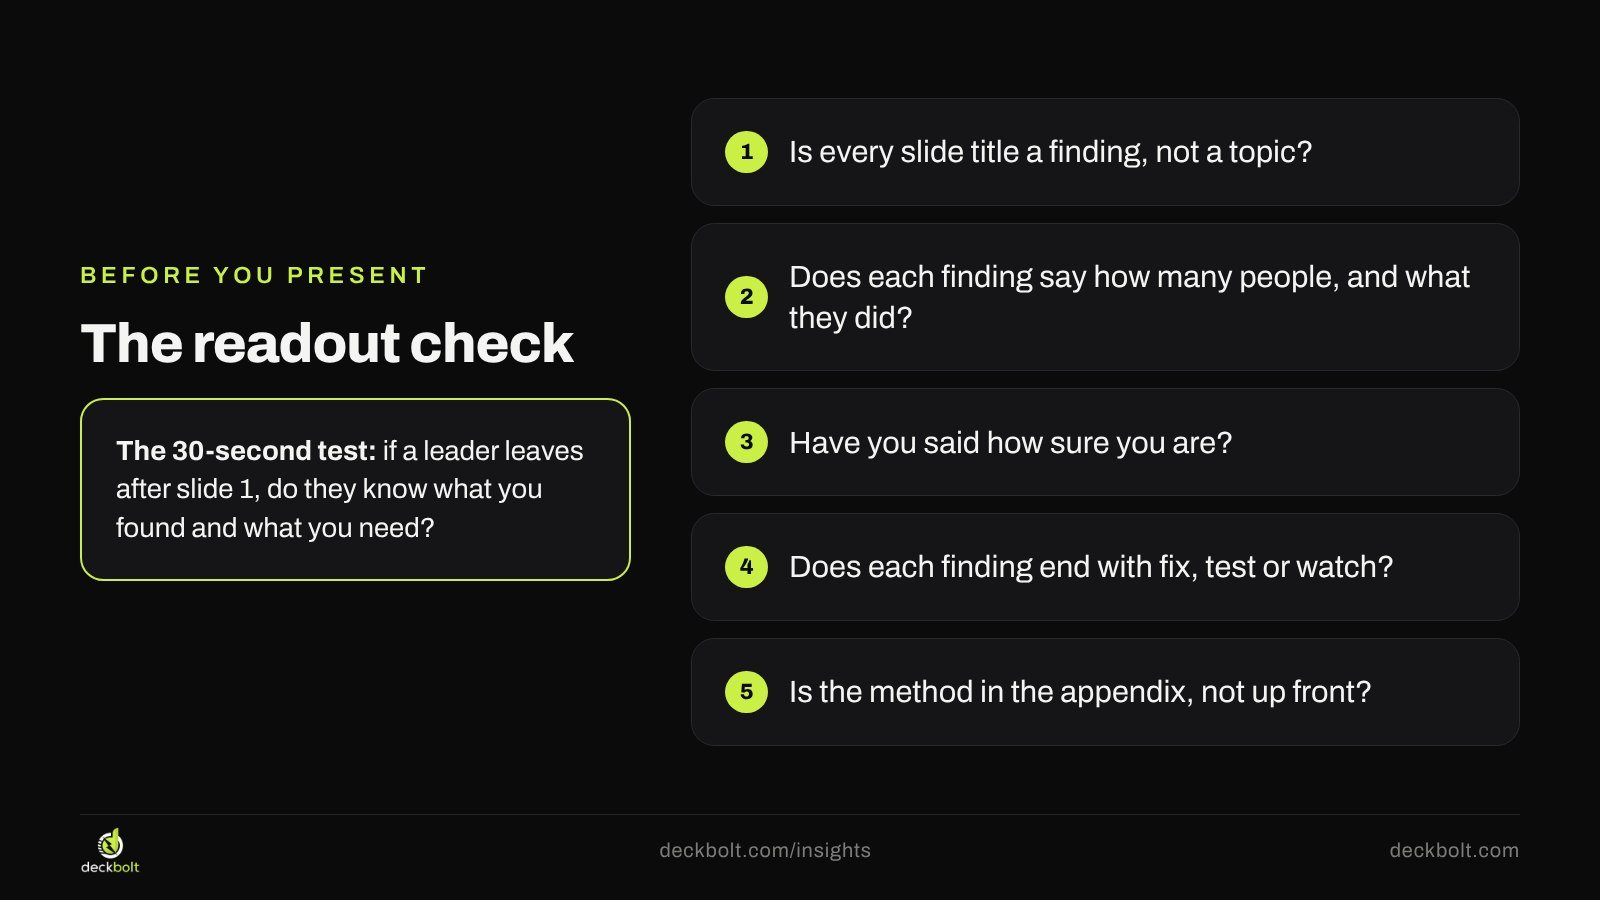
Then run the 30-second test: if a leader leaves the room after your first slide, do they know what you found and what you need from them? If yes, the readout is doing its job. If you want more on putting the answer first, read our guide to answer-first executive presentations and how to write an executive summary slide. For readouts that lean on numbers, our guide to making tables findable helps too.
Note: the clinic software example, numbers and quotes in this article are illustrative.
Presenting research to people who need to decide? DeckBolt designs research readouts, strategy decks and executive presentations in PowerPoint and Google Slides. Request a free deck review and we’ll show you where your next readout could lead with the finding.